
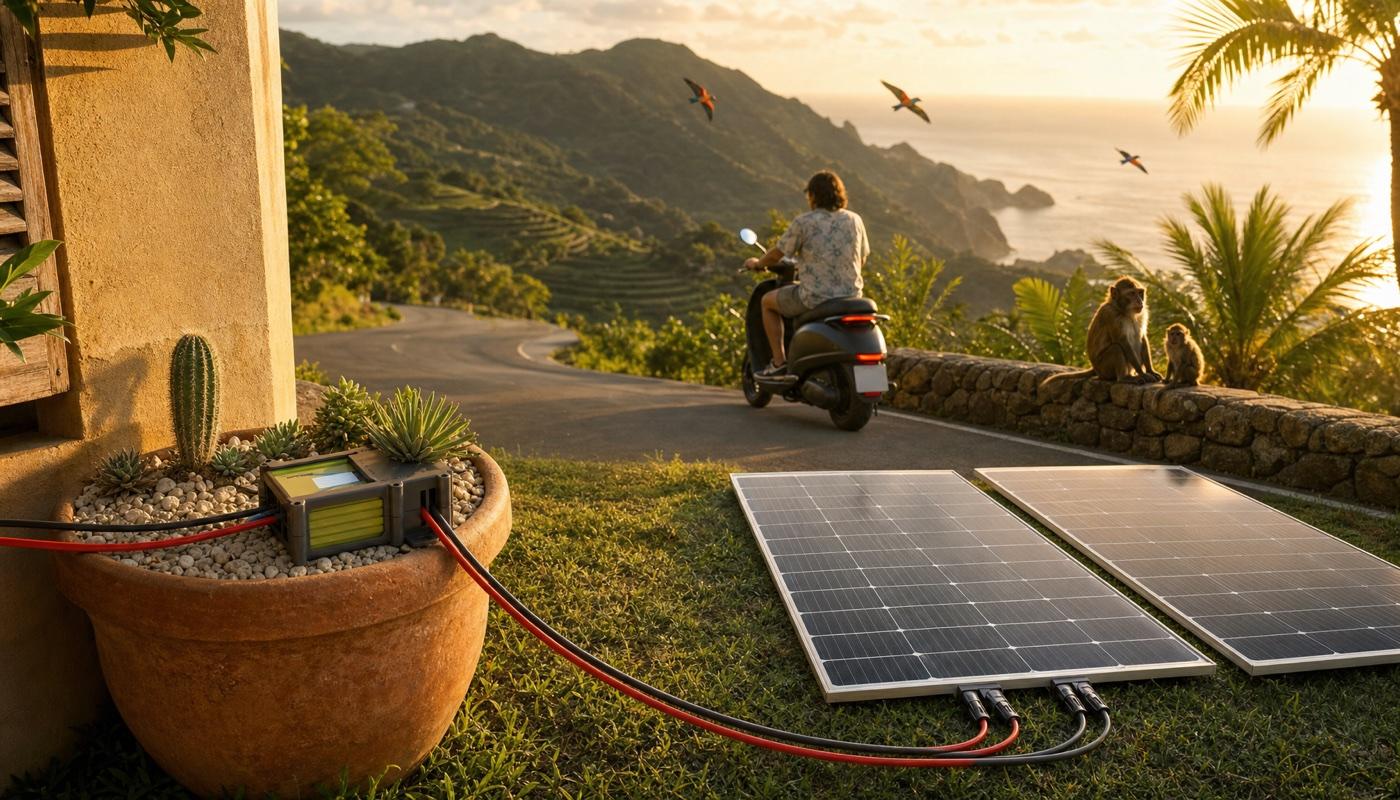
NIU NQi GT Sport
- Battery
- 60 V · 26 Ah3,120 Wh · NMC
- Top speed
- 80 km/h
- Range
- 85 km
- Consumption
- 36.7 Wh/kmestimated
Can You Solar Charge a NIU NQi GT Sport?
No AC inverter needed · No $500 power station · Plugs into the NIU N-series charge port port
A 400 W solar array (2 × 200 W in series) feeding a DC boost MPPT controller recovers a 35 km/day commute on the NIU NQi GT Sport in about 4.9 peak sun hours (5 sun hours/day market average). The NQi GT Sport uses a 60 V 3,120 Wh NMC pack (recorded OEM charger ceiling: 71.4 V DC, confidence: Medium, source — always read your own charger nameplate & verify with a multimeter) and charges through its NIU N-series charge port.
400 W Solar Array
2 × 200 W (2S)
~4.9 hrs sun for 35 km
Daily 35 km commute recovery
~1.3 yr payoff vs. gas
Saves ~$268/yr
Similar vehicles & kit parts
Riders also viewed
- Felo FW0396 V · 5.6 kWh300 W kit · Felo FW03 charge port
 EV
- Felo M148 V · 1.0 kWh150 W kit · Felo M1 charge port
 EV
- NIU FX Pro76.8 V · 2.5 kWh200 W kit · NIU FX Pro charge port
 EV
- Part400W solar array — 2 × 200WKit part
- DC cable, panel to controller — 4mm² min · 6mm² suppliedKit part
 Part
- PartMPPT charge controllerKit part
2 · Kit Cost, Payoff Period & Direct DC Efficiency
Should You Solar Charge Your NIU NQi GT Sport?
Let's consider the important factors — upfront kit cost, payback against buying gas and wall electricity, total cost of ownership versus a new gas scooter, air and noise pollution, and local legal rules in Thailand — so you can decide for yourself.
How much does a solar kit for a NIU NQi GT Sport cost?
A complete direct-DC solar charging kit for the NIU NQi GT Sport costs $353 (including 2 × 200 W monocrystalline panels, a DC boost MPPT controller, sized solar cables, and the matched NIU N-series charge port plug) — roughly one-third the cost of a portable power station setup.
Will You Save Money over Gas?
10-Year Cumulative Fuel Savings — NIU NQi GT Sport
~1.3 yrs
Payoff breakeven vs. buying gas (~$268/yr)
~4.7 yrs
Payoff breakeven vs. wall outlet (~$69/yr)
+$2,868
Net profit vs. gas by Year 10 ($828 in grid kWh avoided)
Is a solar-charged NIU NQi GT Sport really cheaper than petrol?
NIU NQi GT Sport + Solar
3.12 kWh NMC · 80 km/h · 85 km range
$4,112/5 yrs
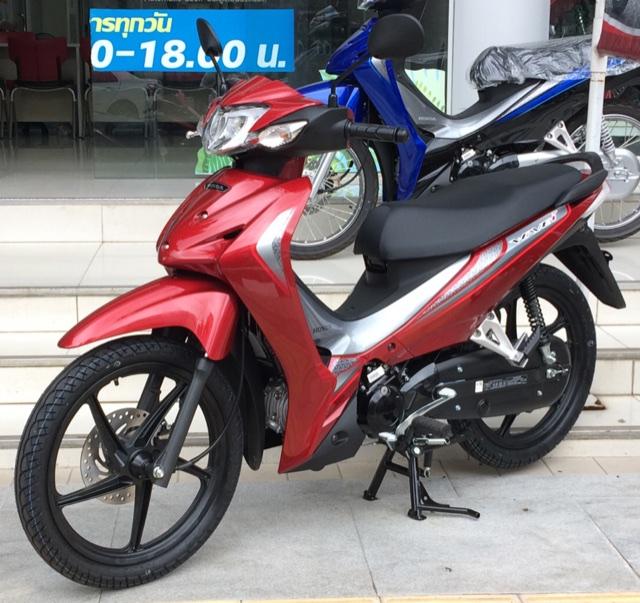
Honda Wave 110i (Gas)
110cc · 55.6 km/L · 92 km/h
$1,538/5 yrs
Why direct DC boost beats a portable power station
Solar Efficiency
Share of panel wattage that reaches the battery
Charges the NIU NQi GT Sport's own 3,120 Wh pack directly without wasting 25–28% of your solar wattage in a DC→AC→DC inverter loop.
Zero home breaker stress (off-grid ready)
Draws 0 W from your home breaker vs. 450 W from the factory AC brick — preventing breaker trips and charging in unpowered sheds or carports.
Will Solar-Charging a NIU NQi GT Sport Reduce Air Pollution (CO₂ & PM2.5)?
In Thailand, the utility power grid averages 440 g CO₂/kWh (18% coal/fossil share). Charging your NIU NQi GT Sport directly from solar eliminates both tailpipe exhaust and power-plant smokestack emissions:
Carbon Emissions per Kilometer (g CO₂/km)
Breathable PM2.5 Air Particles (mg PM2.5/km)
Sources: EPPO Thailand & Ember Electricity Data (~440 gCO2/kWh natural-gas + lignite grid mix); EMEP/EEA Two-Wheeler Emission Inventory & IPCC AR6.
Will Driving a Solar-Charged NIU NQi GT Sport Reduce Noise Pollution?
Decibels (dBA) are logarithmic: every +10 dB sounds twice as loud to the human ear. The NIU NQi GT Sport's brushless electric motor cuts city pass-by noise by 23 dBA (~80% quieter) compared to a 125cc gas scooter, and solar-charges at 0 dBA:
Is It Legal to Solar-Charge a NIU NQi GT Sport in Thailand?
Relevant authority: Energy Regulatory Commission (ERC), MEA & PEA
In Thailand, MEA/PEA parallel-connection permits and ERC notifications apply only when a solar inverter is tied into a building's 230V AC distribution board. A standalone, portable or shed-mounted low-voltage DC solar kit that charges an electric scooter directly is an off-grid DC appliance and requires no utility registration.
- No MEA/PEA Grid Connection: 100% isolated from the 230V AC utility meter.
- Low-Voltage DC (< 60 V): Safe low-voltage DC array and boost controller.
- Stock Charge Port: Connects via the scooter's standard external charge plug.
Ride more or less than 35 km/day? Adjust your daily distance, panel mounting, and cable runs for the NIU NQi GT Sport:
Size Your NQi GT Sport Kit →2a · Head-to-head
How does it compare to popular EVs?
Bars are scaled to the highest value in this group. Cost per km = vehicle price + its solar kit + upkeep, over the same distance for every row (35 km/day for 5 or 10 years); a model with no solar kit pays for grid energy instead. Prices are this market's own figures, shown in your display currency.
Price
new vehicle price- NIU NQi GT SportThis model
- $3,608
- NIU FX Pro
- $1,639
- Felo FW03
- $3,048
- Felo M1
- $1,639
Top Speed
- NIU NQi GT SportThis model
- 80 km/h
- NIU FX Pro
- 80 km/h
- Felo FW03
- 90 km/h
- Felo M1
- 45 km/h
Range
- NIU NQi GT SportThis model
- 85 km
- NIU FX Pro
- 80 km
- Felo FW03
- 120 km
- Felo M1
- 45 km
Battery Size
- NIU NQi GT SportThis model
- 3.1 kWh
- NIU FX Pro
- 2.5 kWh
- Felo FW03
- 5.6 kWh
- Felo M1
- 1.0 kWh
Motor Wattage
- NIU NQi GT SportThis model
- 4.6 kW
- NIU FX Pro
- 2 kW
- Felo FW03
- 6 kW
- Felo M1
- 700 W
Solar Chargeable
— = no plug on record yet- DC charging
- AC charging
- NIU NQi GT SportThis model
- DC charging: Yes
- AC charging: Yes
- NIU FX Pro
- DC charging: Yes
- AC charging: Yes
- Felo FW03
- DC charging: not recorded
- AC charging: Yes
- Felo M1
- DC charging: not recorded
- AC charging: Yes
Cost per km (5 years)
incl. vehicle + kit + upkeep- NIU NQi GT SportThis model
- $0.06/km
- NIU FX Pro
- $0.03/km
- Felo FW03
- $0.06/km
- Felo M1
- $0.03/km
Cost per km (10 years)
incl. vehicle + kit + upkeep- NIU NQi GT SportThis model
- $0.03/km
- NIU FX Pro
- $0.02/km
- Felo FW03
- $0.03/km
- Felo M1
- $0.02/km
Compare them side by side, attribute by attribute →
3 · Solar Kit Parts for NIU NQi GT Sport
What do you need to solar charge a NIU NQi GT Sport?
Click any part below to open the full parts list with safety disclaimers & live retailer links, or customize your daily distance and cable lengths in the free kit configurator:
8 m 1×
 8 m
 1×
 1×
 Optional
 Optional
 Optional
Estimated core kit total: $353
See per-item pricing, electrical safety disclaimers, and direct local retailer links on the full parts list page.
Includes 1 line converted from USD at the regional estimate — the original price is on the parts list.
Watch: 3D Solar Kit Assembly & Safe Wiring Sequence in Action
Placing the panel in full sun, landing PV and battery leads into the dead MPPT terminals first, verifying CV target voltage on the lit LCD, and closing the strain-relief armor.
4 · Complete BOM, 16-Step Assembly Guide & Safe Verification
How to Charge a NIU NQi GT Sport With Free Solar Power
To charge a NIU NQi GT Sport directly from sunlight without an AC inverter or portable power station, a 400 W solar array (2 × 200 W wired in 2S series) feeds a DC-DC boost MPPT controller that steps the array's 36 V Vmp up to your 60 V pack through its NIU N-series charge port. We built two products specifically for the NIU NQi GT Sport so you never have to guess a part, wire gauge, or assembly step:
Your NIU NQi GT Sport Parts List (BOM)
Itemizes every required component and safety tool for your NQi GT Sport kit (estimated core total $353) with direct retailer links — cleanly separated from optional extras so you never overbuy:
- Required Core Hardware (6 items): 2 × 200 W solar panels, DC boost MPPT controller, 6 mm² panel cable (5 m run), 4 mm² vehicle cable (3 m run), matched NIU N-series charge port plug.
- Required Build & Safety Tools (4 items): Digital multimeter (to test panel Voc & meter your OEM charger), wire cutters/strippers, insulated gloves, and clear safety glasses.
- Optional Extras (Never Required — unticked by default): 3D-printable MPPT strain-relief & button-locking shell, 45° PV cable bend guides, and an optional inline DC fuse (belt-and-braces protection for long runs — not required because the MPPT controller already limits its own output current and the scooter has a main battery fuse).
Solar Kit Assembly Instructions + AI Build Assistant
Our interactive step-by-step build guide generated specifically for your NIU NQi GT Sport configuration — taking you from unpacking boxes to a verified solar charge in strict dead-wires-first order:
- Tailored to your exact kit parts: Custom schematic diagrams and exact strip/cut lengths for your 6 mm² (5 m) panel run, 4 mm² (3 m) vehicle run, and NIU N-series charge port connector.
- Strict dead-wires-first electrical order: Every screw terminal and wire splice is completed while panels are covered/unplugged and the scooter is disconnected — you never handle a live conductor.
- Includes US$5 of AI Build Assistant credit: Snap a photo of your multimeter reading, MPPT terminal wiring, or solder-seal splice at any step for instant verification before plugging in (plus read-aloud audio on every step).
The 4 Build Phases: How Your NIU NQi GT Sport Solar Kit Goes Together
Because the charge socket on your NIU NQi GT Sport is a live battery terminal, our 16-step assembly guide sequences the build into four distinct phases so you never guess polarity or work on live wires:
Check your BOM, test panel Voc (~21.6 V) in sun & dry-fit the layout
Verify all required parts and safety tools against your Bill of Materials (BOM). Before mounting anything (while still inside the seller's return window), place each panel in full sun and measure open-circuit voltage (~21.6 V DC per panel) with your multimeter. Position the panels in unshaded sun and the boost MPPT in dry ventilated shade, then dry-fit both cable runs before cutting wire.
Wire the array & land both MPPT terminal blocks while completely dead
Join the 2 panels (2S) and check ~43.2 V string Voc with your meter, then leave the panel MC4 leads unclipped (or keep panels covered). Route the 6 mm² panel cable and 4 mm² vehicle cable, and screw both into the MPPT's PV+/PV− and BAT+/BAT− terminals in one sitting while zero voltage is present.
Meter your isolated OEM charger plug & bench-splice the NIU N-series charge port lead
Never plug bare pigtail wires into the scooter or probe the live vehicle socket blind. Plug your factory AC wall charger into the wall and probe its isolated DC output plug with your multimeter to identify positive (+) and negative (−). At the bench with everything disconnected, slide on the yellow 4.0–6.0 mm² solder-seal tube first, heat-splice the two power conductors, tug-test, insulate unused signal pins separately, and meter for zero continuity between + and −. (An inline DC fuse is optional belt-and-braces protection for long runs, not a requirement, since the MPPT limits its own output and the scooter has a main fuse.)
Boot the MPPT on solar, set your verified CV & current limits, plug in & verify on the dash
Clip the solar array MC4 connectors together first (with the scooter still unplugged) so the MPPT display boots on solar power. Read the DC OUTPUT rating on your own OEM charger nameplate (confirmed by your multimeter) and set the MPPT's constant-voltage (CV) ceiling at or slightly below that figure — never above — along with the current limit. Plug into the NIU NQi GT Sport, watch watts climb on the controller, and verify after 10 minutes that your scooter's dashboard battery % has risen.
All 16 Steps Generated for Your NIU NQi GT Sport Kit
- 1Gather required parts & tools against your Bill of Materials (BOM)Free Sample
- 2Test each panel's open-circuit voltage (~21.6 V Voc) in full sun before mounting
- 3Plan the layout (panels in full sun, boost MPPT in dry shade, dry-fit cable runs)
- 4Mount or place the 2 panels with a 0.5 m seasonal service loop
- 5Wire the 2 panels in 2S & verify ~43.2 V string Voc with your multimeter
- 6Run the 5 m (6 mm²) panel cable to the controller (leave array unplugged)
- 7Strip 6–7 mm & crimp MC4 connectors onto the panel-side cable ends
- 8Wire the panel cable into the MPPT PV+ and PV− screw terminals while dead
- 9Run the 3 m (4 mm²) vehicle DC cable from the MPPT to your parking spot
- 10Wire the vehicle cable into the MPPT BAT+ and BAT− terminals in the same dead sitting
- 11Meter polarity on your isolated OEM charger plug, solder-seal splice the NIU N-series charge port lead at the bench & insulate unused pins
- 12Clip the solar array MC4 leads together to wake the MPPT display (~43.2 V PV in, scooter still unplugged)
- 13Read DC OUTPUT on your OEM charger nameplate, verify with your meter & set the MPPT CV ceiling
- 14Set the MPPT charge current limit at or below your OEM rating (this array supplies ~5.6 A)
- 15Plug the verified NIU N-series charge port connector into the NIU NQi GT Sport & watch the MPPT settle into charging
- 16Confirm climbing watts on the MPPT & verify the scooter's dashboard battery % rises after 10 minutes
Recorded NIU NQi GT Sport Charger Specs & Connector Family
The table below lists the battery architecture, recorded OEM wall charger specifications with their confidence level and source, and our connector verification status. We never recommend an MPPT voltage setpoint: always read the DC OUTPUT rating on your own OEM charger nameplate and verify it with a multimeter.
| Nominal Voltage | 60 V DC |
|---|---|
| Pack Capacity | 3,120 Wh (26 Ah × 2) |
| Battery Chemistry | NMC (Removable pack) |
| Recorded OEM Charger Rating | 71.4 V DC max Medium |
| Connector Family | NIU N-series charge port Medium |
| Pin Count & Gender on Vehicle | Unmeasured · female (on vehicle) |
| Adapter Verification Status | Sourced · Plug available |
Recorded Data Sources
- 60V 26Ah x2, 80 km/h, 70-100 km, 4600W peak, 6h charge
- TH listing, 2026-11-15: NIU Thailand store page for the NQiGT Sport — the maker's own market site, with THB pricing.
- TH price, 2026-11-16 (official-store): NIU Thailand store price for the NQiGT Sport. AutoFun lists THB 154,000-154,900 for the same model; the maker's own store is used.
Solar Kit Assembly Instructions + AI Build Assistant
Follow interactive wiring diagrams for your exact cable gauge and connector family, with an AI build assistant ready to verify photos at every step.
5 · NIU NQi GT Sport Solar Charging FAQ & Distance Sizing
NIU NQi GT Sport Solar Charging FAQ
How many watts of solar do I need to charge a NIU NQi GT Sport?
For a 35 km/day (21.7 mi/day) commute (~1285 Wh/day), the NIU NQi GT Sport needs a 400 W solar array (2 × 200 W wired in series) feeding a DC boost MPPT controller. At 5 peak sun hours/day, 400 W recovers a 35 km ride in about 4.9 sun hours. For a 40 km/day (24.9 mi/day) commute (~1468 Wh/day), step up to a 480 W array.
How do I verify the OEM charger voltage and pin polarity on the NIU NQi GT Sport?
Our dataset records the NIU NQi GT Sport OEM charger ceiling at 71.4 V DC (confidence: medium), but you should never copy a voltage figure blindly from the web. Read the "DC OUTPUT" rating printed on your own original OEM AC wall charger nameplate, then plug the OEM brick in and probe its isolated DC output plug with a digital multimeter to verify both the constant-voltage ceiling and which pin is positive (+) and negative (−) before wiring your NIU N-series charge port lead (port status: sourced).
Can I charge the NIU NQi GT Sport from solar while riding?
No. Direct DC solar kits are designed for stationary daytime charging while parked at home or work, with the panels in full sun and the boost MPPT resting in ventilated shade. Many vehicle BMS units also inhibit throttle output while the charge port is active.
Sunshine Hours & Array Sizing by Daily Distance (10–40 km/day)
Computed from a consumption rate of 36.7 Wh/km, a 3,120 Wh pack, 5 peak sun hours/day in Thailand, a 0.70 real-world panel derating factor, and boost MPPT + DC cable efficiency.
| Daily Distance | Daily Wh | Recommended Array | Wiring & Vmp | Sun Hrs to Recover | 0–100% Full Pack |
|---|---|---|---|---|---|
| 10 km/day | 367 Wh | 120 W (1 panel) | 1S · 18 V Vmp | 4.8 hrs | 8.1 sunny days |
| 20 km/day | 734 Wh | 240 W (2 panels) | 2S · 36 V Vmp | 4.6 hrs | 4.2 sunny days |
| 30 km/day | 1101 Wh | 400 W (2 panels) | 2S · 36 V Vmp | 4.2 hrs | 2.8 sunny days |
| 35 km/day | 1285 Wh | 400 W (2 panels) | 2S · 36 V Vmp | 4.9 hrs | 2.4 sunny days |
| 40 km/day | 1468 Wh | 480 W (4 panels) | 2S2P · 36 V Vmp | 4.6 hrs | 2.1 sunny days |